Houdini MC gives you the ability to control HUE lights either manually or as part of a timed/smart event.
Step 1: Create an account on https://developers.meethue.com/develop/hue-api/lights-api/
Step 2: Make sure your bridge is connected to your network and is functioning properly. Test that the smartphone app can control the lights on the same network. Discovering of the bridge is only supported in case the Hue bridge and the Houdini MC PC are located in the same network (logical subnet)
Step 3: You need to discover the IP address of the bridge on your network. You can do this in a few ways.
Use one of the discovery methods to find Philips hue in your network. See HERE
- Use a UPnP discovery app (fi FING) to find Philips hue in your network.
- Use our broker server to discover the process by visiting www.meethue.com/api/nupnp
- Log into your wireless router and look Philips hue up in the DHCP table.
- Hue App method: Download the official Philips hue app. Connect your phone to the network the hue bridge is on. Start the hue app(iOS described here). Push link to connect to the bridge. Use the app to find the bridge and try controlling lights. All working — Go to the settings menu in the app. Go to My Bridge. Go to Network settings. Switch off the DHCP toggle. The IP address of the bridge will show. Note the IP address, then switch DHCP back on
Step 4: Once you have the address load the test app by visiting the following address in your web browser. http://<bridge ip address>/debug/clip.html
Step 5: Here, you’ll see a tool that lets you manually send commands to your Hue bridge. If you don’t understand everything on this page, that’s alright. You only need to use this tool to get your API username. To do that, enter /api/ in the URL box. Under Message Body, enter {"devicetype":"HoudiniMC"}
Step 6: Fill in the info below and press the POST button.
| Address | http://<bridge ip address>/api |
|---|---|
| Body | {"devicetype":"HoudiniMC"} |
| Method | POST |
Step 7: When you’ve entered all the info, tap the link button on your Hue bridge. This is a security step to make sure that only you or someone inside your home can create applications to control your lights. Once you’ve pressed the link button on your bridge, click POST.
Step 8: In the Command Response box, you should see your unique username. You’ll be given a long, randomized username. Copy this down somewhere and save it. You’ll need it later on. – If you don’t get any response, please install and activate this plugin on Chrome
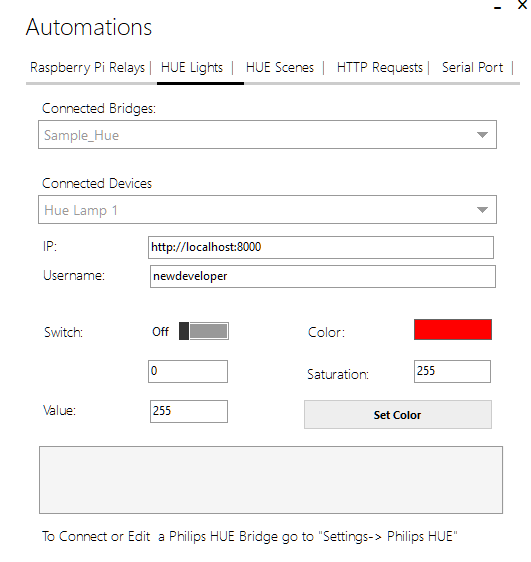
Step 9: On Houdini, go on Settings->Philips HUE tab and press Add. Fill the “Username” and “IP” field (make sure you use the http// term on IP field) and press “Connect”. Automatically, Houdini will read all the connected on the specific bridge devices. Following the steps 1-6, you can add more brides.
Go on Automations->Hue Lights and select a connected bridge. Again, Houdini automatically detects the connected devices. Select the color, switch it on or off and press “Set Color” to send the command.
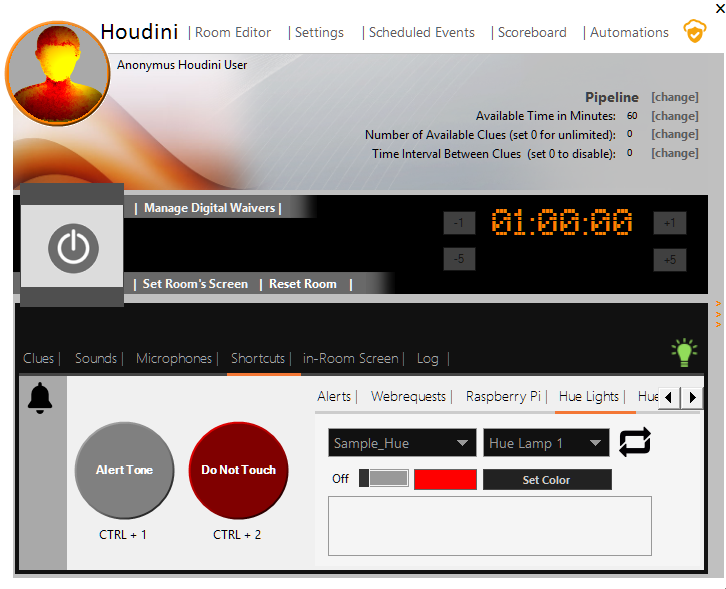
Similarly, this menu is also accessible through the Shortcuts tab.
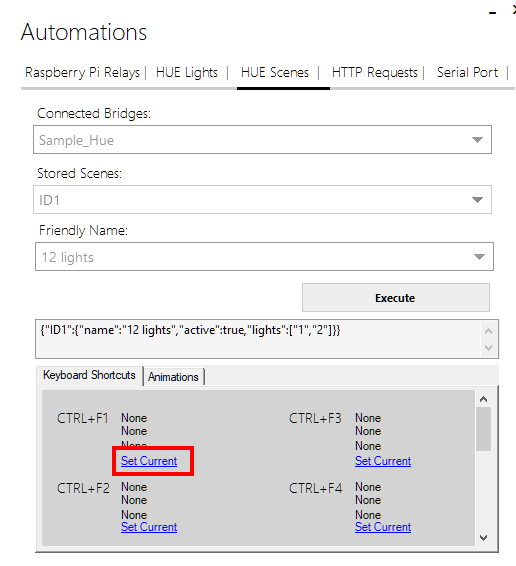
Go on Automations->Hue Scenes and select a connected bridge. Once more, Houdini automatically detects the stored scenes. From this menu, you can either manually call a scene (simply select a scene and select execute) or assign a scene to a keyboard shortcut. Select a scene and click on “Set Current: so as to assign the displayed keyboard shortcut to a specific scene.
Once more, this menu is also accessible through the Shortcuts tab.
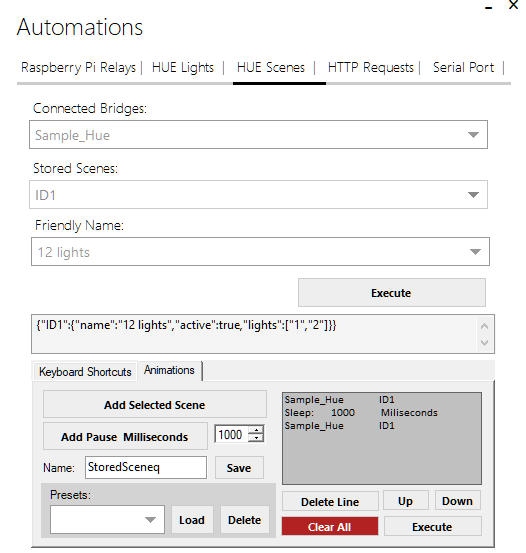
Houdini gives you the ability to create custom animation effects by combining stored scenes. Go on Automations->Hue Scenes, select a connected bridge and click on the animations tab. Assume for an example that a scene sets the lights into red and is called Scene_A. A second sorted scene sets the lights into white. This scene is called Scene_B
Using the animations tab you add Scene_A
Then add pause for 1000 ms
Then add scene Scene_B
This will create an alarm-like animation.
Type an name (e.g. "StoredScene1") and press "Save".
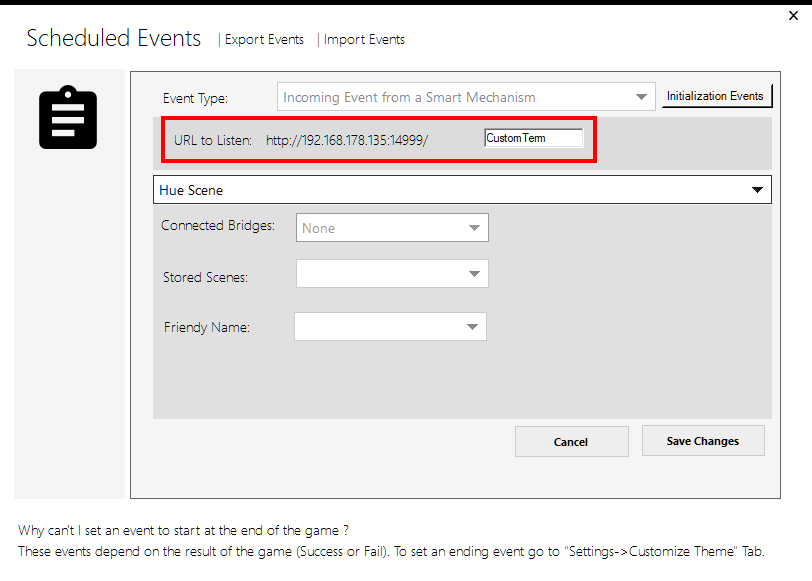
How do I set up a Hue Scene to play either when a team wins or looses?
Go on <Scheduled Events> and create new <Incoming Event From A Smart Mechanism>