
This tutorial will help you understand the basics of Houdini MC. Use the default theme and the default room (Safecracker) to play around with the software’s settings and parameters.
Terminology:
Houdini MC consists of 2 components. The first component is the Master software, while the second one is the in-room screen.
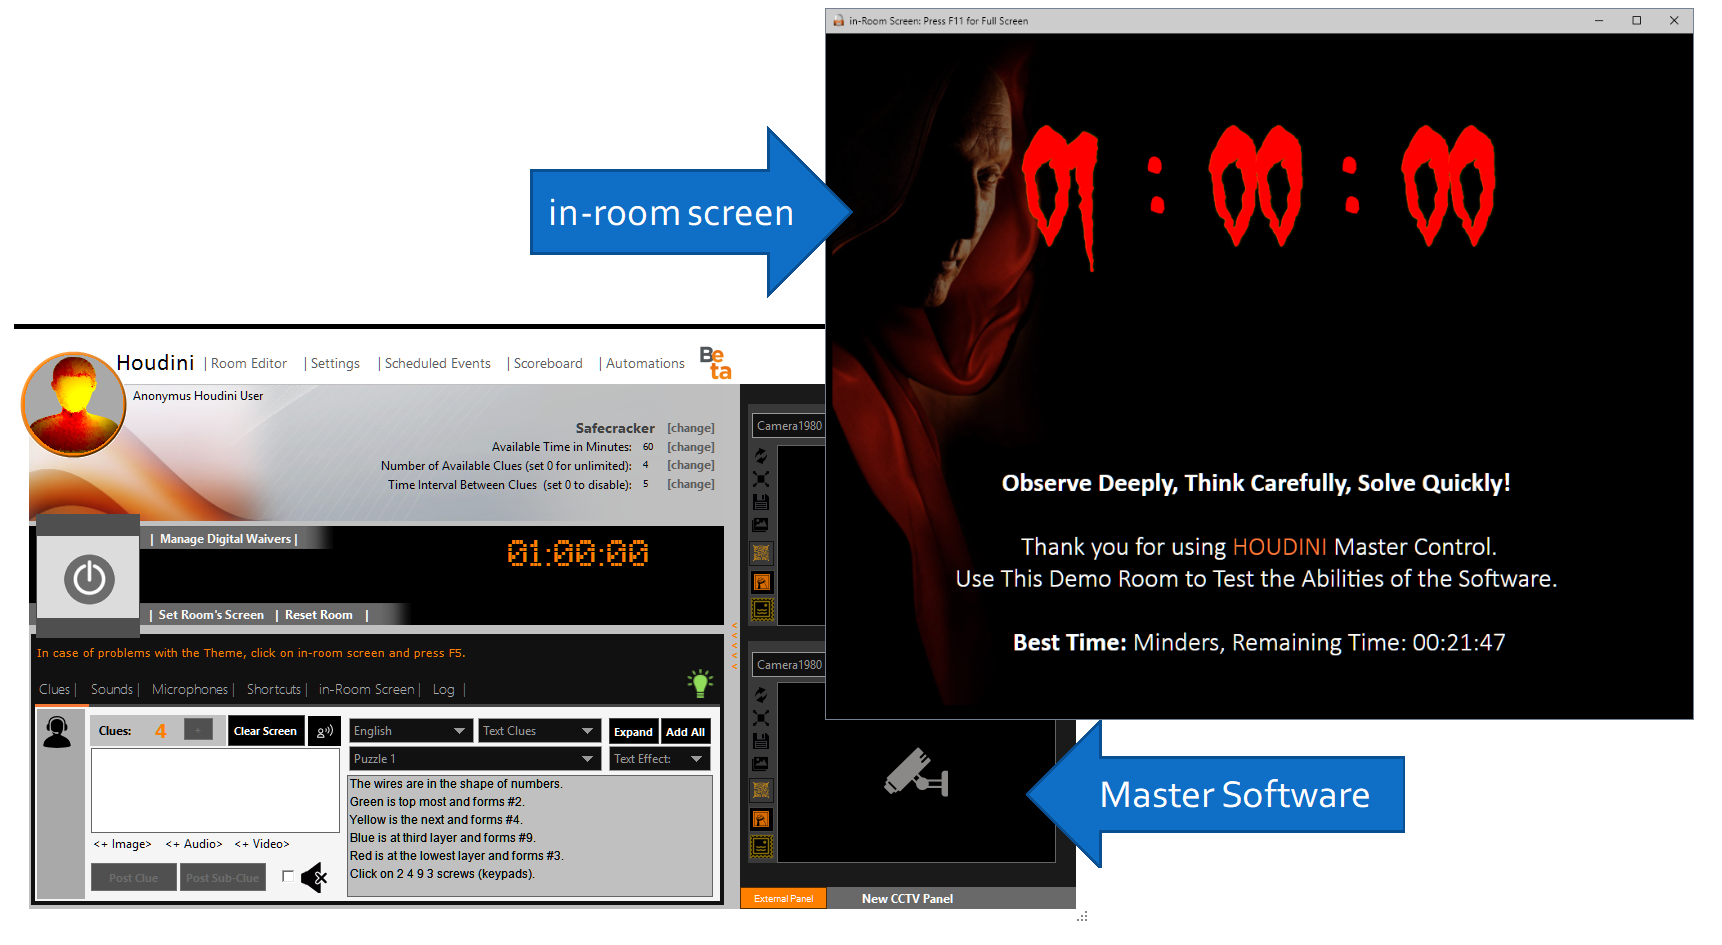
In general, Master Software is separated into four regions.
- Setup Region: This region provides information about the selected room
- Control Region: The region that allows you to start, end and monitor the game
- Console Region: The area that allows you to interact with the players
- CCTV Panel: The area of the software that allows you to monitor the CCTV system

Click on the in-room screen header, hold the left mouse click, and drag and drop the window on the second screen. Now click on the in-room window and press F11 to set it on full-screen mode. More details are given [Here].
To start your first session, please follow the next steps:
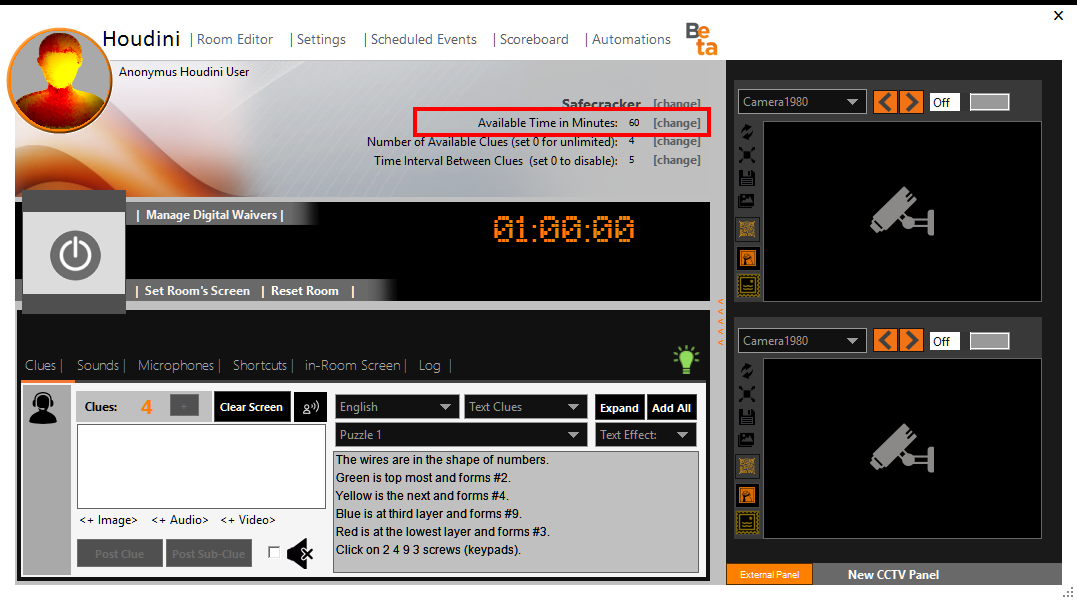
Step 1: Modify the “Available Time”
Check the following image. Click on <Change> and type the number 15. Press enter on your keyboard.
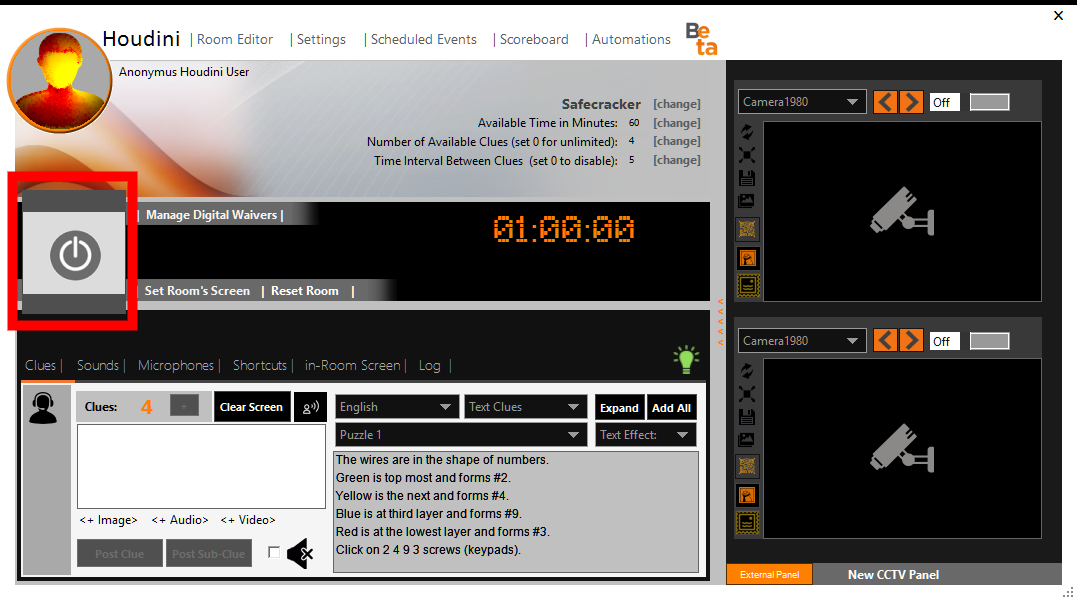
Step 2: Start the Game
Locate the <Start/Stop> button (see image below) and press it to begin a session.
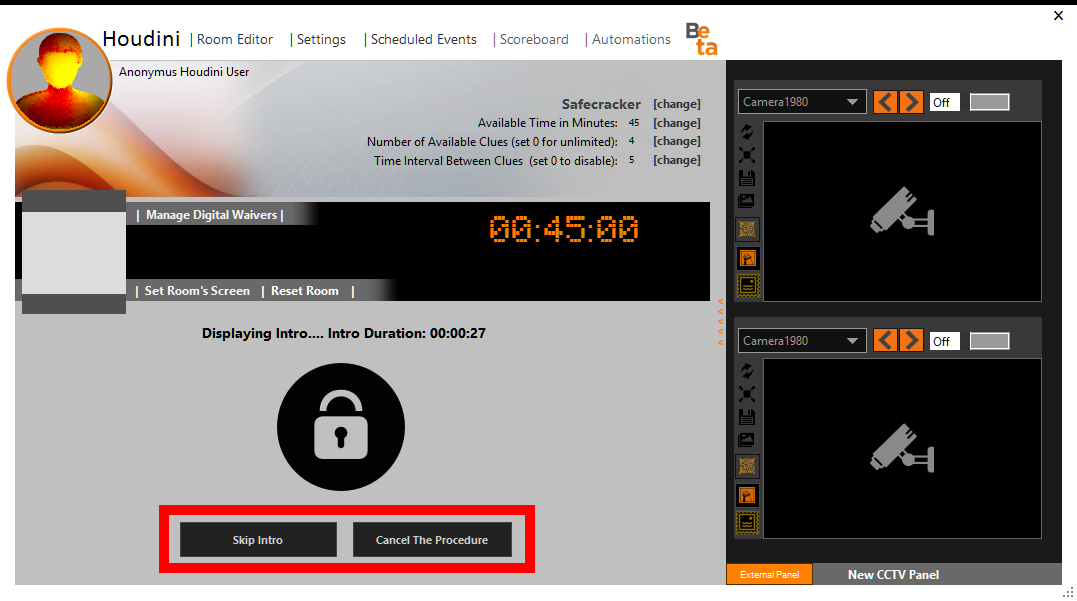
The in-room screen displays an intro video. Please note that two control buttons allow you to cancel the procedure, skip the video, and immediately start the game. Moreover, Houdini MC informs the game-master about the remaining duration of the video.
To select the video, go on <Settings-> Customize Theme 2/2>
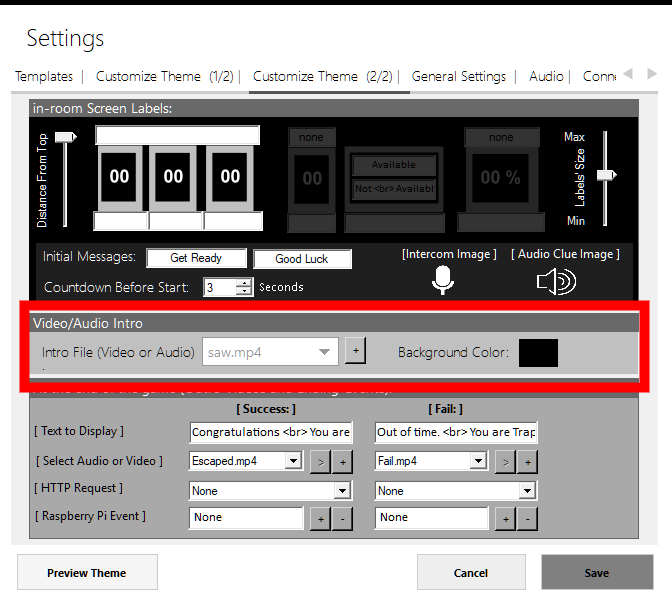
You can either select a .mp4 file for a video intro OR a .mp3 file for an audio one.
To be fully compatible with the HTML5 video tag, video streams must have a constant bit rate. If you face a “black screen” issue, encode your video using a constant bit rate. Use this online converter (for free) to re-encode the video.
During the game
The console region consists of the following six tabs
- Clues’ Console
- Sounds Manager (for more details, kindly refer to the Audio tutorial)
- Microphones Manager (for more details, kindly refer to the FAQ section)
- Shortcuts Menu
- in-room Screen interaction section
- Log manager
This tutorial will guide you on how to use the clue’s console.
Clues’ Console
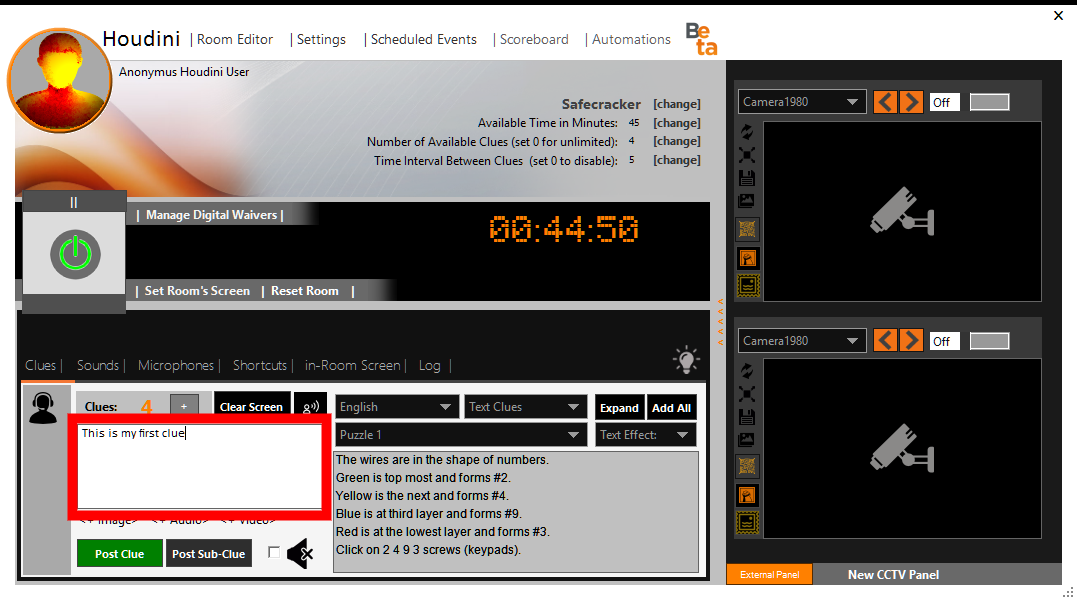
The clues’ console allows the game-master to send clues to the players. As the following image depicts, a multi-line text box serves as a shout-box. Game-master enters a text in this area and presses the <Post Clue> or the < Post-Sub-Clue> buttons to display this text on the in-room screen. To start with, please type “This is my first clue” and press <Post Clue>
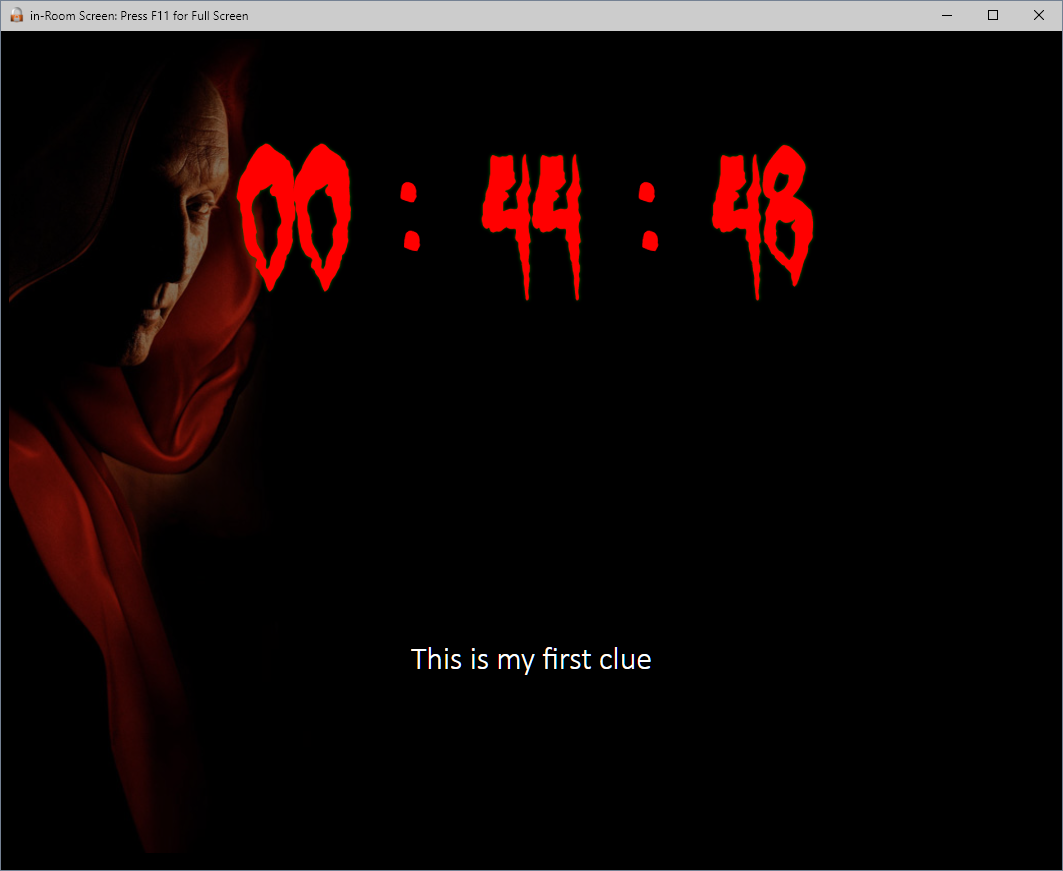
Your message now appears on the in-room screen:
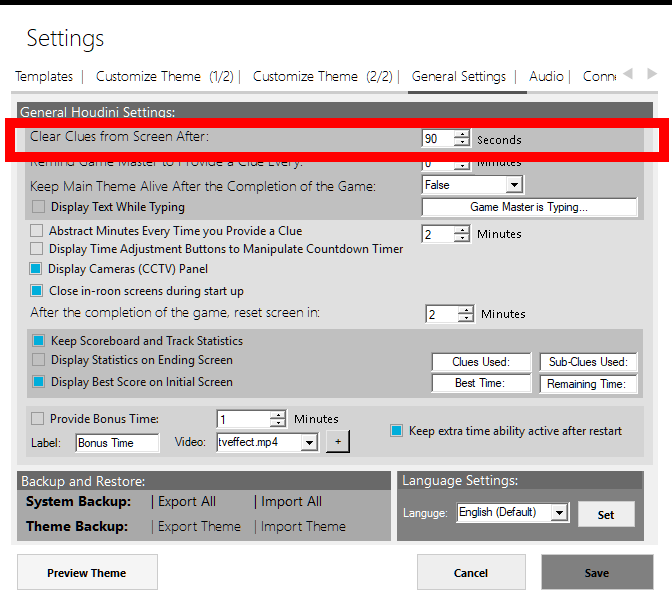
This clue will be visible for a specific period only. To change this period, go on <Settings->General Settings> and change the “Clear Clues from Screen After” value:
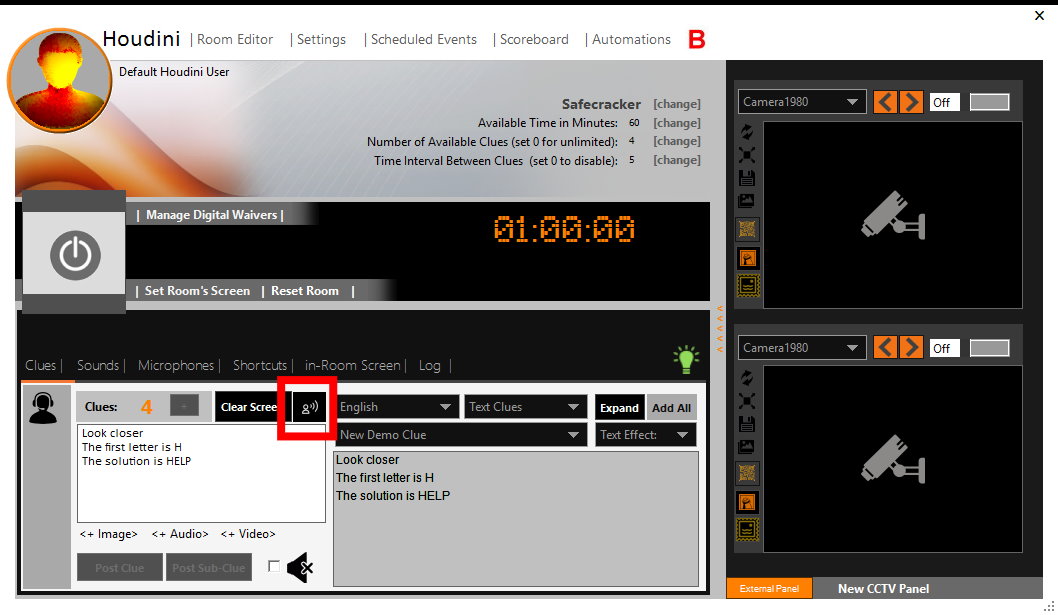
It is worth noting that when a game is in progress, write a clue on the shout-box and click on the depicted on the following image button to convert it to voice.
 Houdini MC allows the game masters to also write HTML code on the shout-box. Try enter this text “This is <b>my first </b> clue” and press <Post Clue>.
Houdini MC generally allows game masters to provide a predefined number of clues. One can define this number by using either the “Room Editor” or by directly modifying the value next to the “Number of available clues” label (click on the “[change]” label, enter the preferable number, and press the “Enter” key see Arrow 1). Moreover, the game-master can add additional clues on the fly during the game by pressing the <+> button (kindly refer to the green arrow). For an unlimited number of clues, use the value “0”.
Every time you press the Post Clue (see arrow 2) button, the number of clues is decreased by one. The remaining clues are listed on the top of the shout-box.
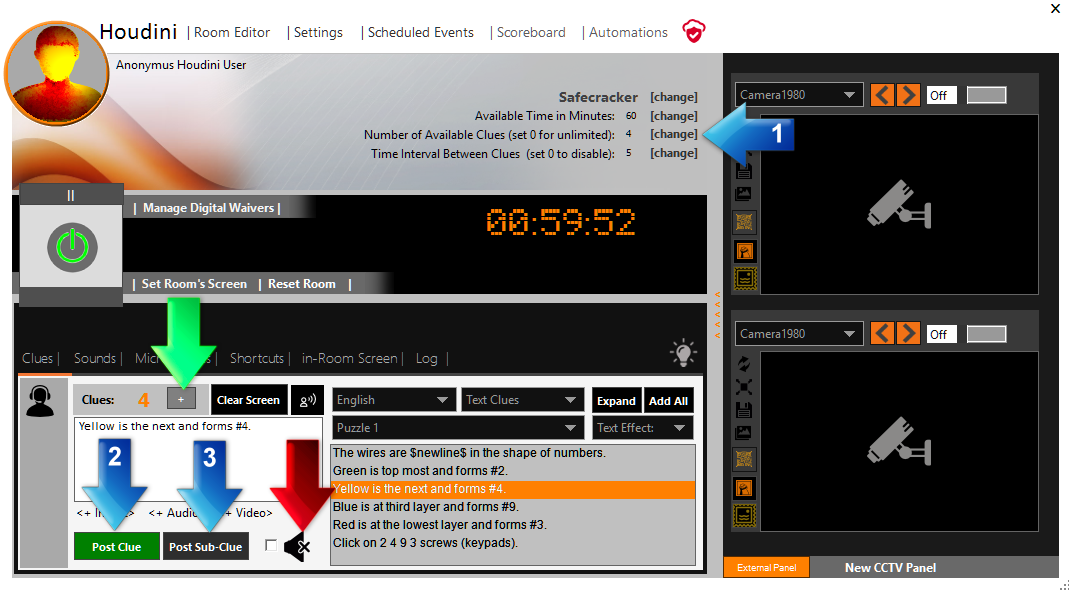 Alternatively, the game-master can post the clue without decreasing the number of the remaining clues by pressing the Post Sub-Clue button (see arrow 3)
To send a clue or a sub-clue without an alert tone, click and check the “Mute” checkbox (see red arrow).
As one can easily observe, stored clues are fully organized into 2 categories:
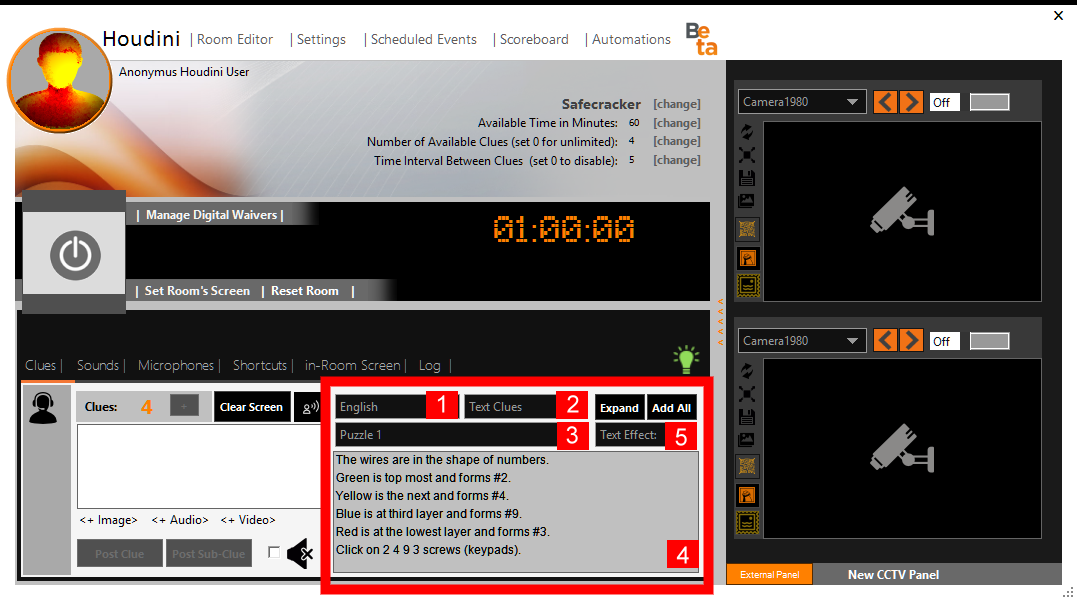
- The language of the clues [see image below – Drop-down menu (1) ]
- Type of the clues [see image below – Drop-down menu (2) ]
- Text Clues
- Image Clues
- Audio Clues
- Video Clues
Use the drop-down menu (1) and select the language for the clues you want to use. The default room uses two languages: English and Greek. To start with, select English. Then, using the drop-down menu (2), select “Text Clues.”
The drop-down menu (3) contains the list of the puzzles. For each puzzle, a set of text clues is available and are listed in the region (5). Please note that each line can be used as a single clue. For more details on how the text clues are organized, kindly refer to the <Room Editor> tutorial. Double-click on a clue to add it to the shout-box. Then either press the <Post Clue> or the < Post-Sub-Clue> button to display it on the in-room screen.
- Hold the [SHIFT] key and left-click to select all text clues within a range. Double-click to add them to the shout-box.
- Hold the [CTRL] key and left-click to select the next clue. Do it multiple times to choose non-consecutive text clues. Double-click to add them to the shout-box.
- Select one or more than one clue and press [MIDDLE] click to immediate post it/them (when a game is in progress)
- Press [SHIFT]+[ENTER] to post the clues from the shout-box.
If you simultaneously want to add all the listed clues, simply press the <Add All> button. Moreover, if you want to manage the text clues using an external panel, click on the <Expand> button.
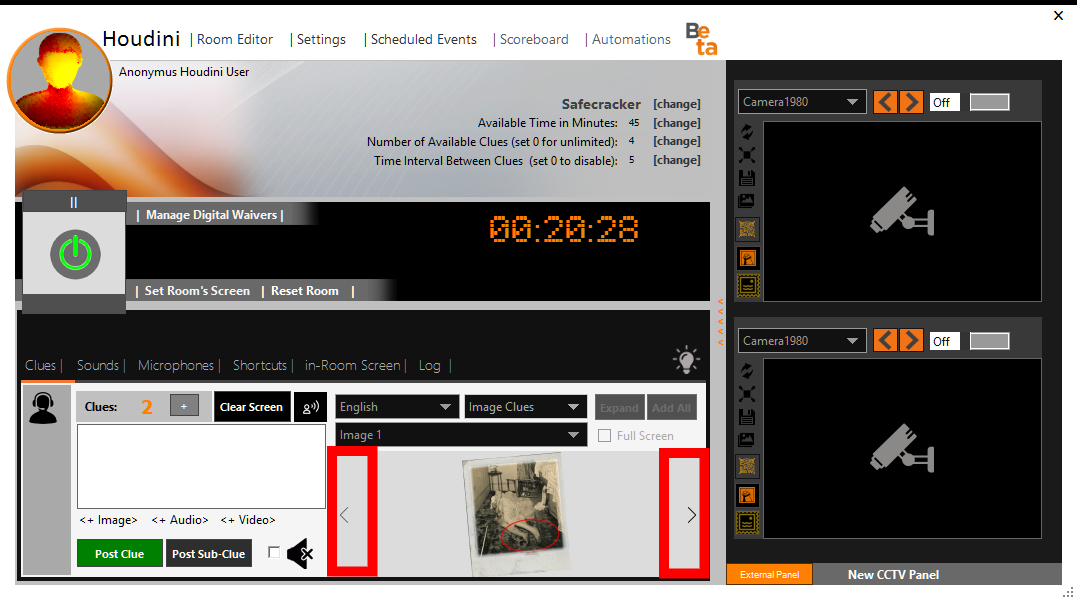
Now, change the drop-down menu (2) and select “Image Clues”. Similar to text clues, image clues are listed in the drop-down menu (3). You can either directly select the image clue you want to use and press the <Post Clue> or the < Post-Sub-Clue> button or browse through the available clues using the illustration on the following image arrow buttons.
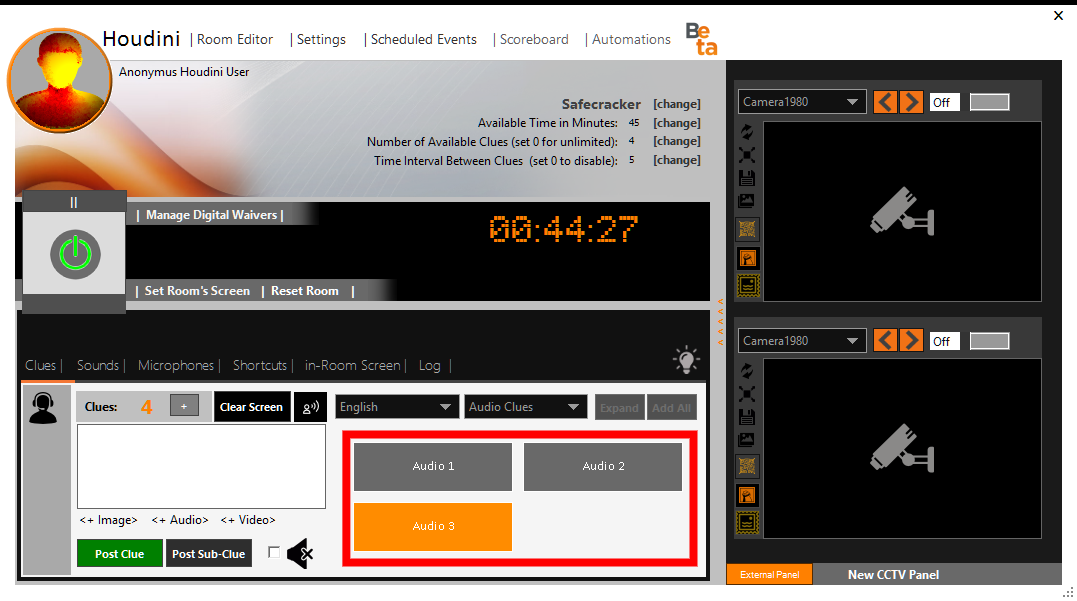
Now, on the drop-down menu (2), select “Audio Clues”. The audio clues are listed as buttons. Select the audio clue you want to send and press the <Post Clue> or the < Post-Sub-Clue> button.
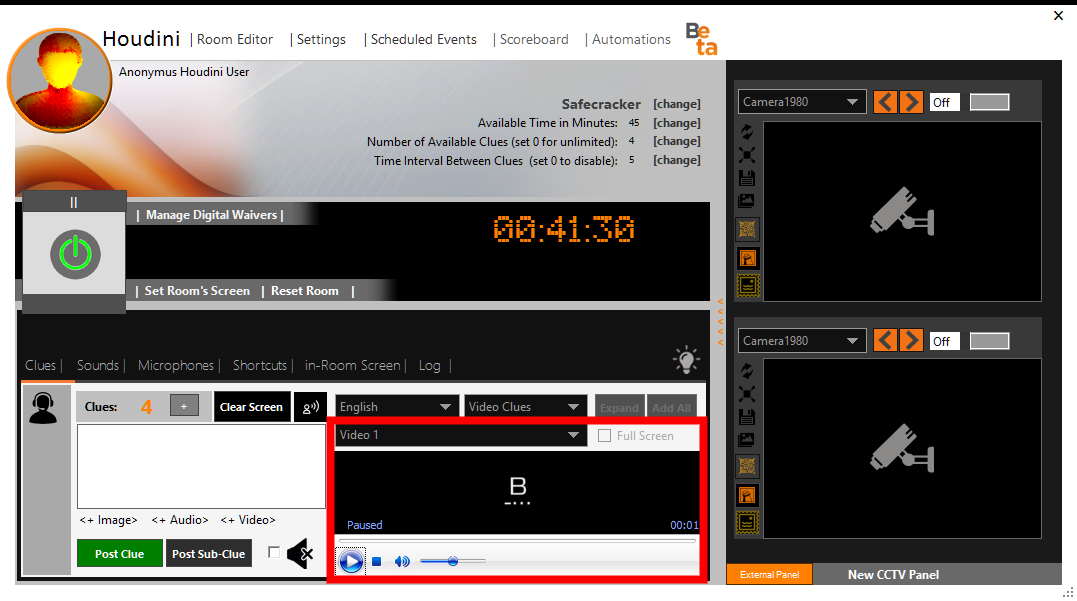
Finally, use the Drop-down menu (2) and select “Video Clues”. The drop-down menu (3) lists the set of available video clues. It is worth noting that one can press “Play” and preview the video before posting it on the in-room screen.
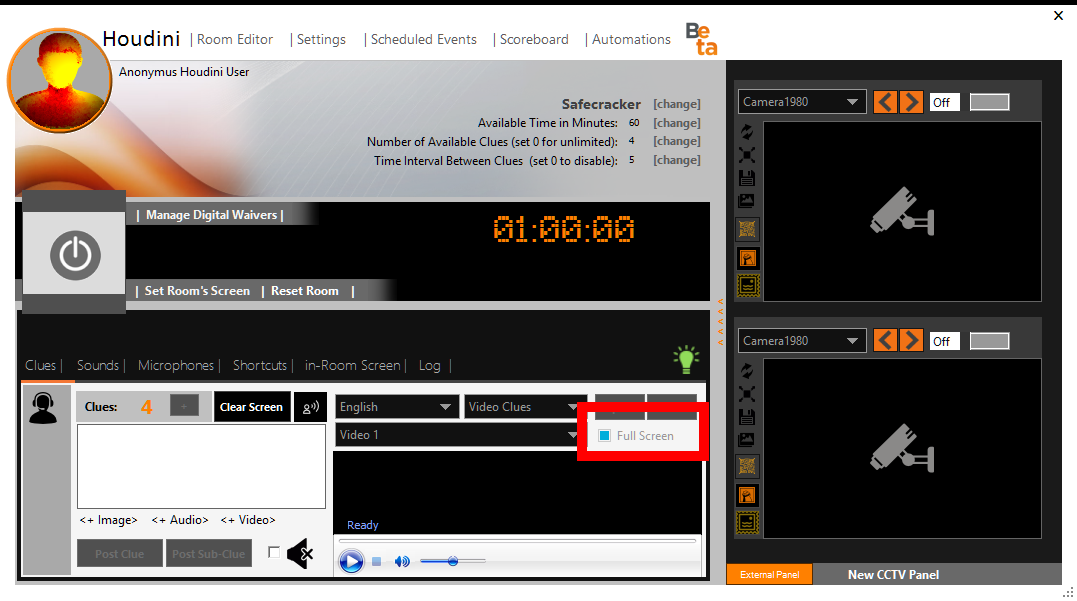
If you prefer to display Image clues and Video clues on full screen, please follow the next steps:
 Please note that you also have the ability to attach text phrases with images, audio, and videos. Simply type a text on the shout-box while a multimedia clue is selected. This will produce a hybrid clue since it will simultaneously display both the multimedia selected clue and the text clue on the in-room screen!
Press the <Star/Stop> button to end the game.