
Using Houdini MC one can directly set HIGH or LOW a specific GPIO pin of a Raspberry Pi and control any High-Voltage device.
You can directly control your GPIO from <Automations> menu, switching HIGH=1 or LOW=0 to the desired GPIO.
How to control a high voltage device such as a smoke machine.
You will need a Raspberry Pi (we recommend a Raspberry Pi 3), a relay and of course the high voltage device. Next, we assume that this device is a smoke machine.
- Connect your Raspberry Pi with Houdini. To start with, go on <Settings->Raspberry Pi> and click on <Add>
- Select a name to describe the device, the SSH IP and the Port (usually, by default the value is equal to 22)
- Provide the username and the password. The default user is pi, and the password is raspberry.
- Please make sure that:
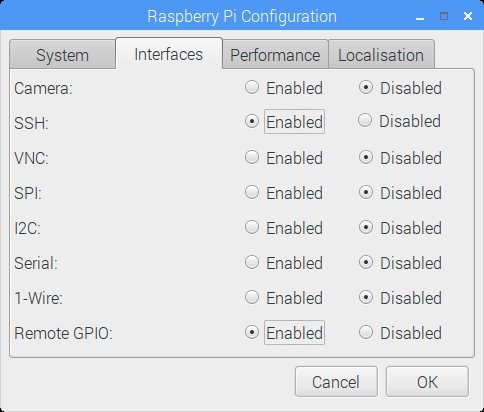
- SSH Connection on Raspberry PI is enabled [Tutorial]
- “Remote GPIO Control” is also enabled – Go on Raspberry Pi configuration and enable “Remote GPIO”
- Install wiringp – sudo apt-get install wiringpi
- Let’s do the dirty job! Connect the smoke machine on the relay and the relay on a specific GPIO pin. If your not familiar with this procedure please check this tutorial. Since we are talking about high voltage please be extremely careful!
- Houdini MC can force the specific GPIO to switch from 0 to 1 and vice versa – activating or deactivating the device. In other words, using Houdini MC you can directly control your GPIO switching HIGH=1 or LOW=0 to the desired GPIO. It is worth noting that this solution does not require a line of code!
- (For Versions Before 1.8)
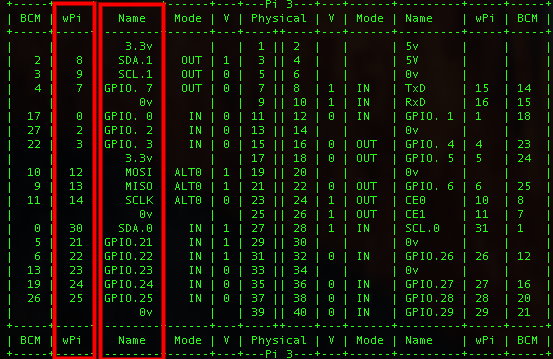
Go on <Automation -> Raspberry Pi Relays>, select your device and click on <Connect> button. Houdini MC will read the value of all the GPIO pins. Please note that HOUDINI MC uses the WIRED PI pins to control your PI. (***This is different from the BCM GPIO’S !!!***). To see how Wired Pi are related to GPIO please check the following image:
 [For Latest Release]
Starting from 1.8 version, the Houdini MC software will no longer support the wPi numbering scheme. The new versions of the software will only adopt the GPIO numbering of the Raspberry Pi pins. If your escape room uses Raspberry Pi to interact with devices, please make sure that both, on Automations and Scheduled Events menus, you have updated appropriately the numbering scheme. - From the <Scripting> menu, please select the wPi pin you want to switch on (1) or off (0) and click on <Add>. Of course, you can repeat the procedure, and control the value of more than one GPIO pins add the same time. Using the <Delete Line> and <Clear All> buttons you can modify your selections.
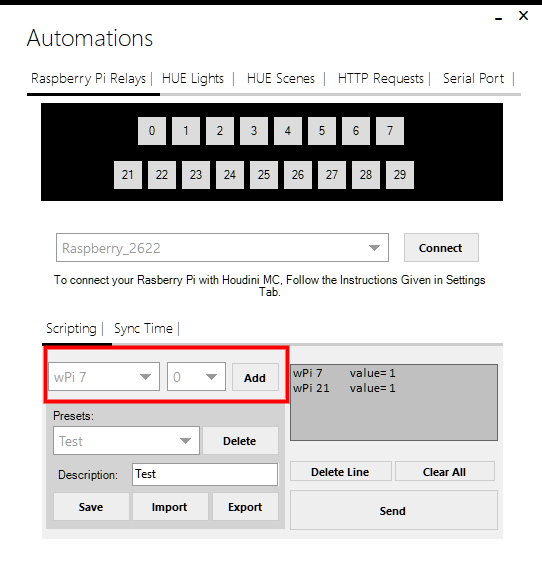
- By pressing the <Send> button the commands are forwarded to the Raspberry Pi.
- In the sequel, use a custom description on the <Description> filed and press <Save> to store your commands for later use. The same form gives you access to all saved set of commands.
- It is worth noting that the same interface allows you to export these commands into a single file, and load them on a different instance n Houdini MC (on a different PC).
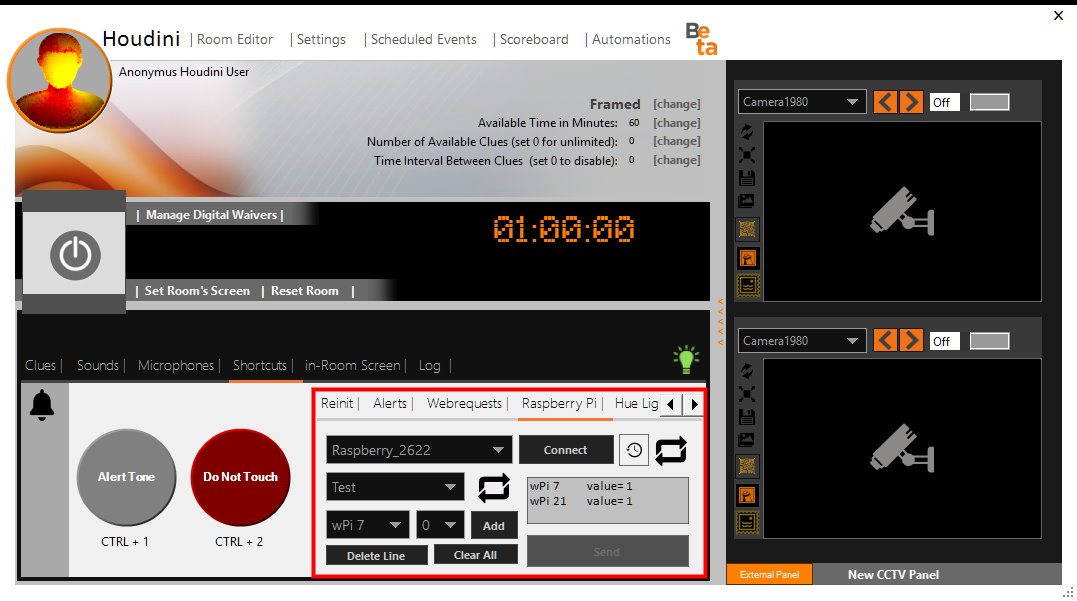
Stored commands are accessible not only from the <Automations> menu but also from the <Shortcuts> tab.
Finally, it is worth noting that a stored set of commands can also be executed as part of scheduled events. Simply, go on <Scheduled events> select a new timed on smart event and assign the stored commands. If timed-events are used, our smoke machine (or any other high voltage device) will be automatically activated on a specific timestamp. In the case of smart events, our device will be activated when e.g. players solve a riddle.