
This tutorial briefly presents how to interact with an Arduino UNO Ethernet shield. Very special thanks to Ed Wolf and Hour To Midnight – Room Escape Games in Portland, Oregon USA. for this excellent tutorial. Please check the following presentation and the attached files:
What you will need:
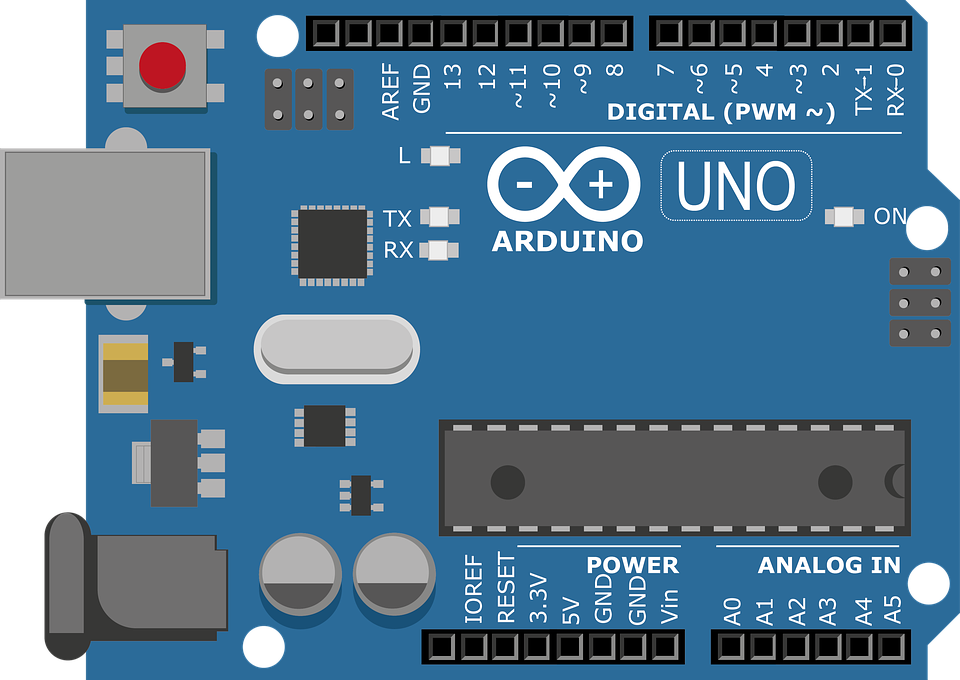
Arduino UNO
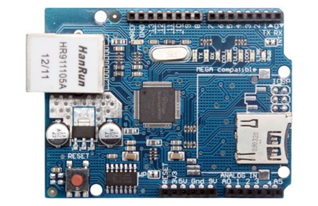
Arduino Uno Network Shield
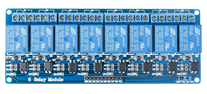
8-channel Relay
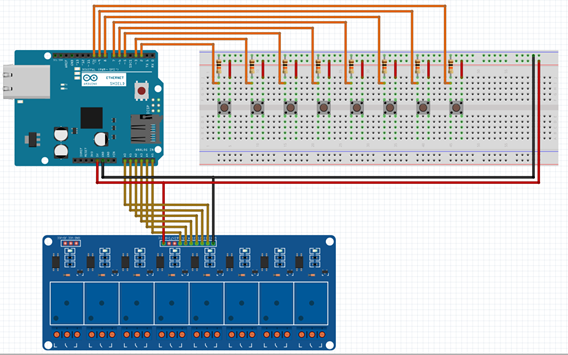
You may need to build a circuit board or use a prototype shield for your inputs.
The resisters are 10k ohm. This is used to pull the inbound pins to the ground (LOW). The other side of the switch is connected to the 5v supply to cause the inbound pin to go (HIGH) when pushed. This tells the Arduino that the button is activated.
NOTE: pins 4,11,12,13 are not used as it is needed for the UNO-Ethernet shield connection.
The Relay board is used for pushing single out from the UNO to your real-world devices.
NO-normally open (not on)
NC-normally closed (on by default)
C-common
If you want the Arduino to run faster after your testing. Be sure to comment out the “Serial” lines.
If you are not using all of the 8 inputs Comment out the If statements of the inputs you are not using. The UNO will think there are switches acting randomly if you do not comment them out.
See the following files for more details
Note: to comment a line add // to the first of that line.
8 Input 6 output UNO.fzz – the layout
Uno-Interface__two_way_08-05-21_Debounce.ino – the source code
Very special thanks to Ed Wolf and Hour To Midnight – Room Escape Games in Portland, Oregon USA. for this excellent tutorial.